知道了可以透過Make將資料保存進Notion之後
這次要說明的是將Facebook粉絲專頁的貼文紀錄進Notion的資料庫裡面
要使用的Make工具有「Facebook Pages的Watch Posts」、「Notion的Create a Database Item」
文章大鋼
串接Facebook帳號

跟著步驟串接自己的Facebook帳號
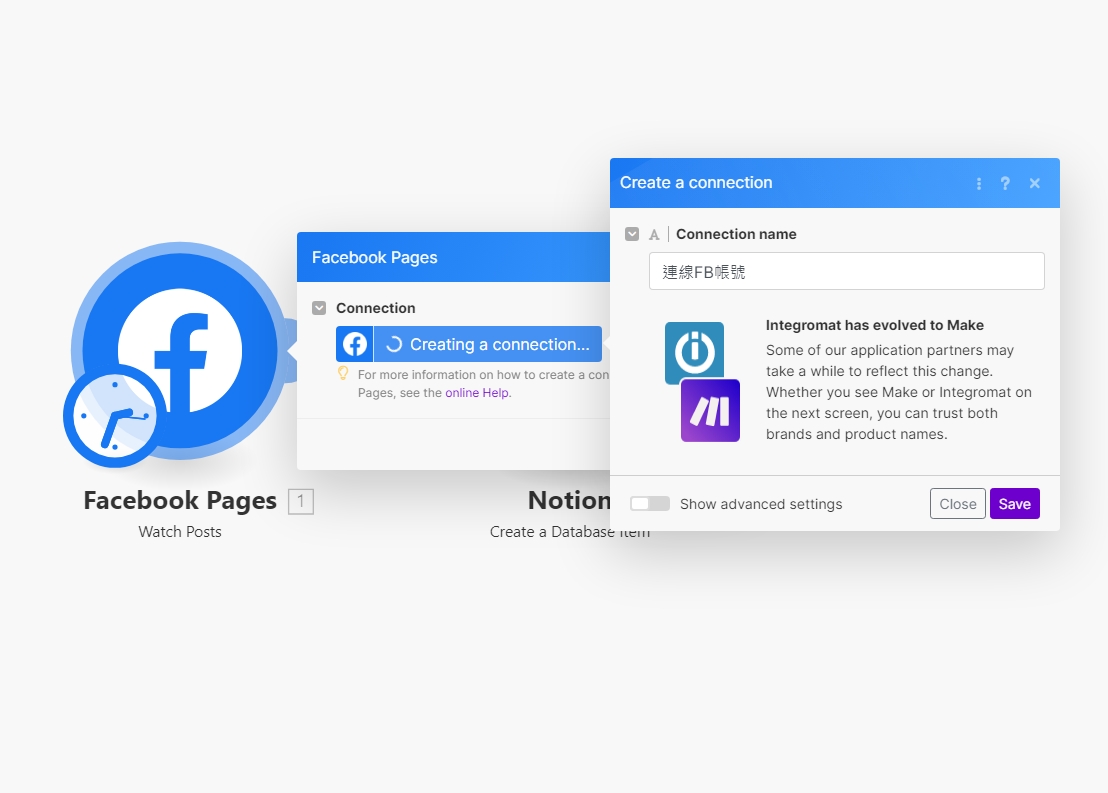
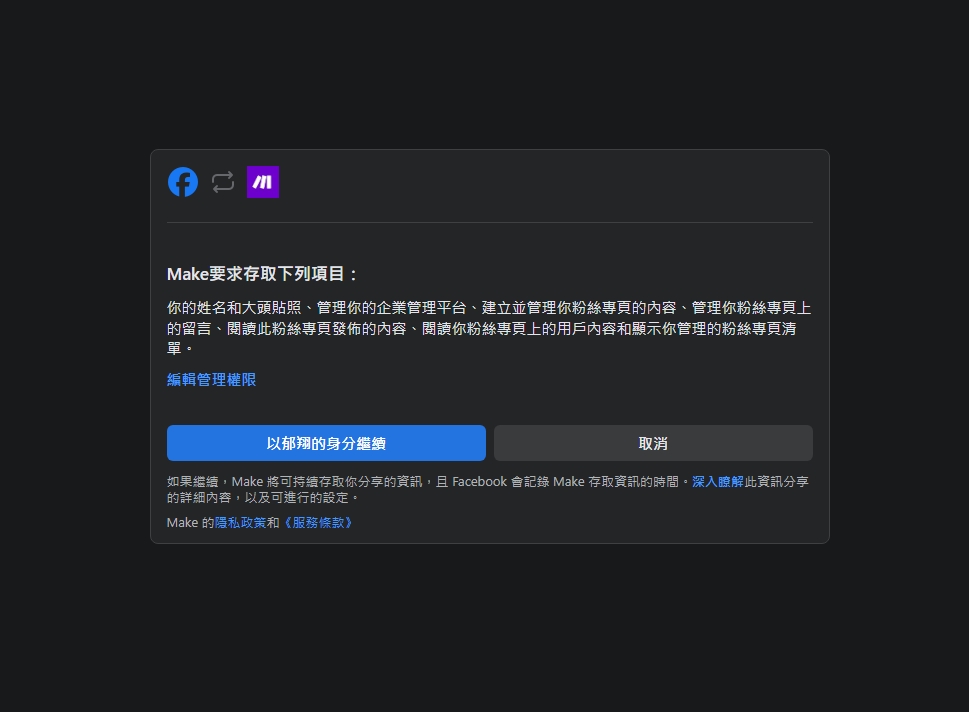
串接完成後,可以偵測此帳號管理的粉絲專頁
選擇要使用的粉專就可以了

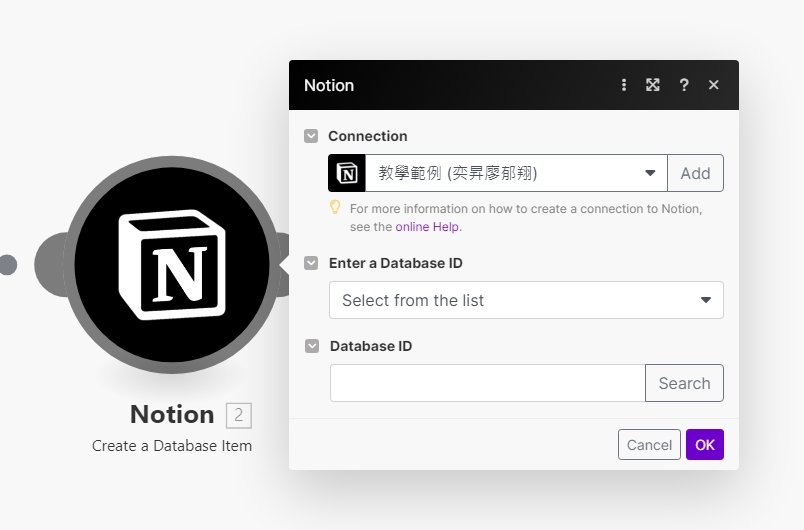
串接Notion
詳細的串接可以參考:使用Make工具將資料儲存進Notion
基本上串接很簡單,只要在Make工具選擇Notion的Create a Database Item
之後選擇要使用的資料庫即可
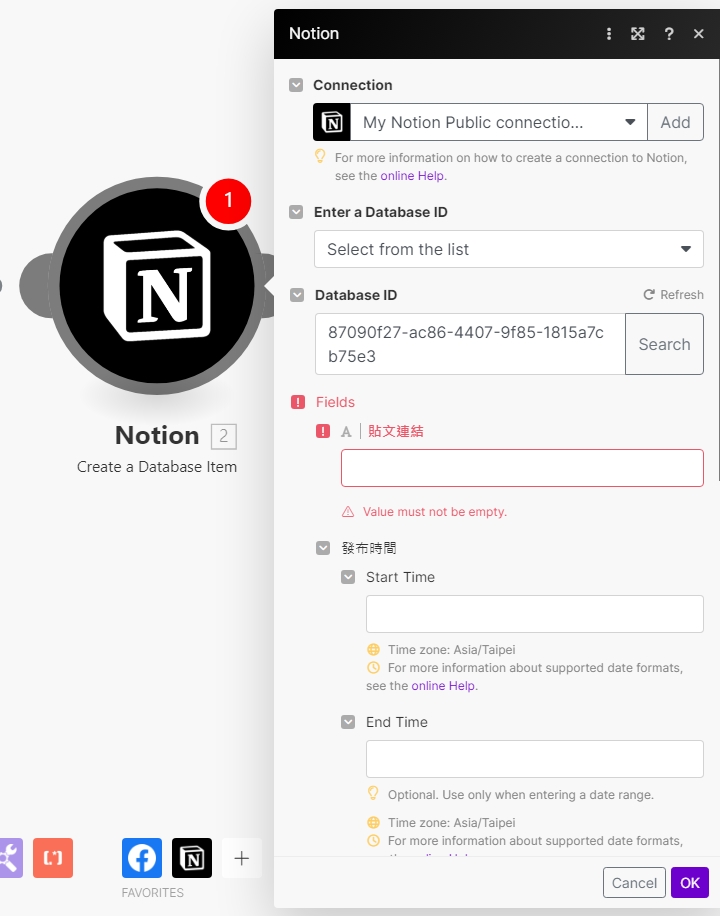
FB發文後將資料儲存進Notion
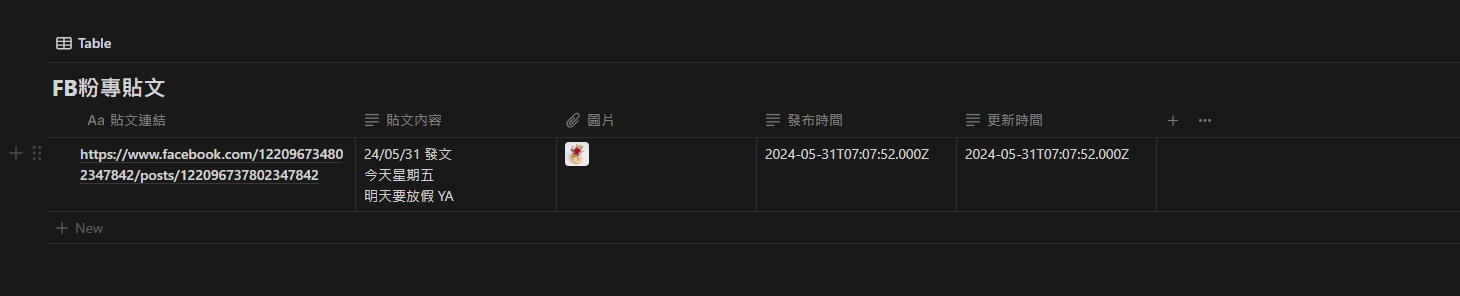
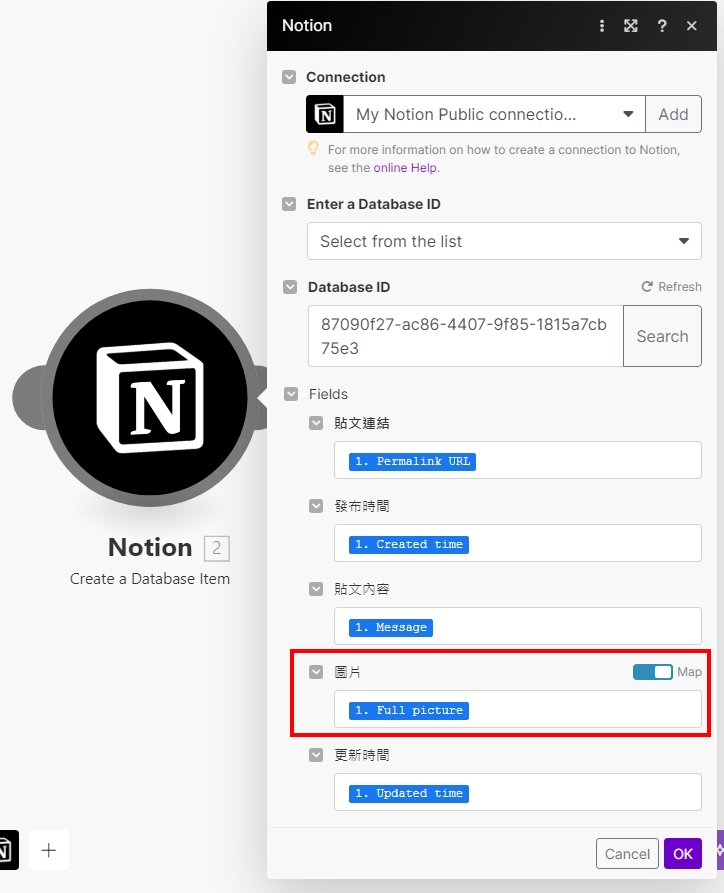
Notion的欄位設定:貼文連結、貼文內容、圖片、發布時間、更新時間
在填寫將參數設定完畢後就可以了
比較大的問題應該是圖片這邊
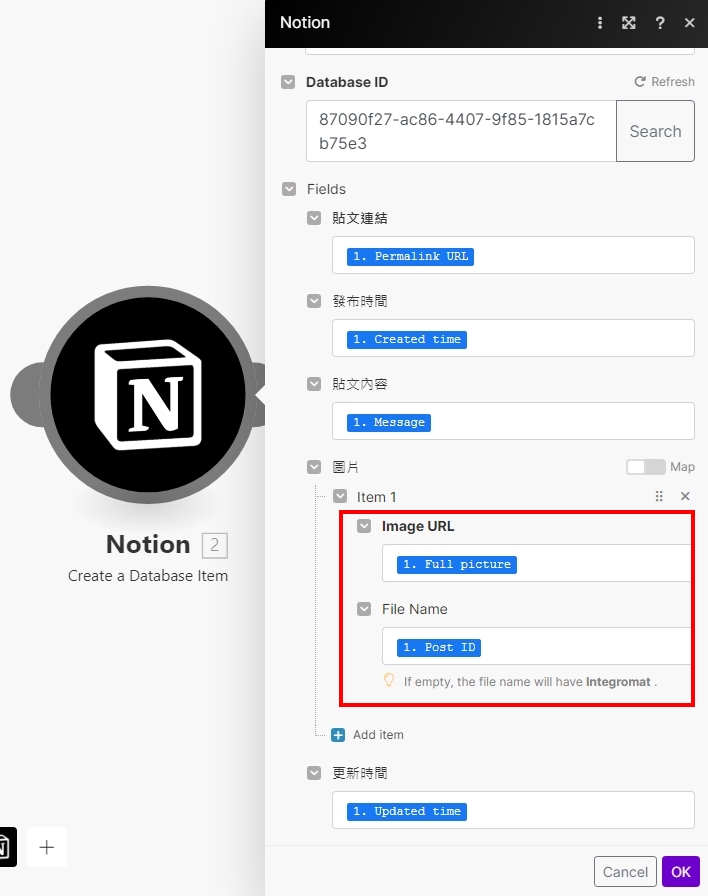
由於Notion抓取圖片資料是需要檔案名稱的
所以要取消Map的勾選
然後除了輸入圖片連結,也要給這張圖片一個檔名
本次範例是使用文章ID來當這張圖片的檔案名稱
完成上傳