若想要透過MAKE建立自動化流程協助發送信件
串接Gmail就是要稍微設定一下才能完成串接
跟著以下步驟來完成MAKE與Gmail的串接流程吧
文章大鋼
申請Google cloud專案
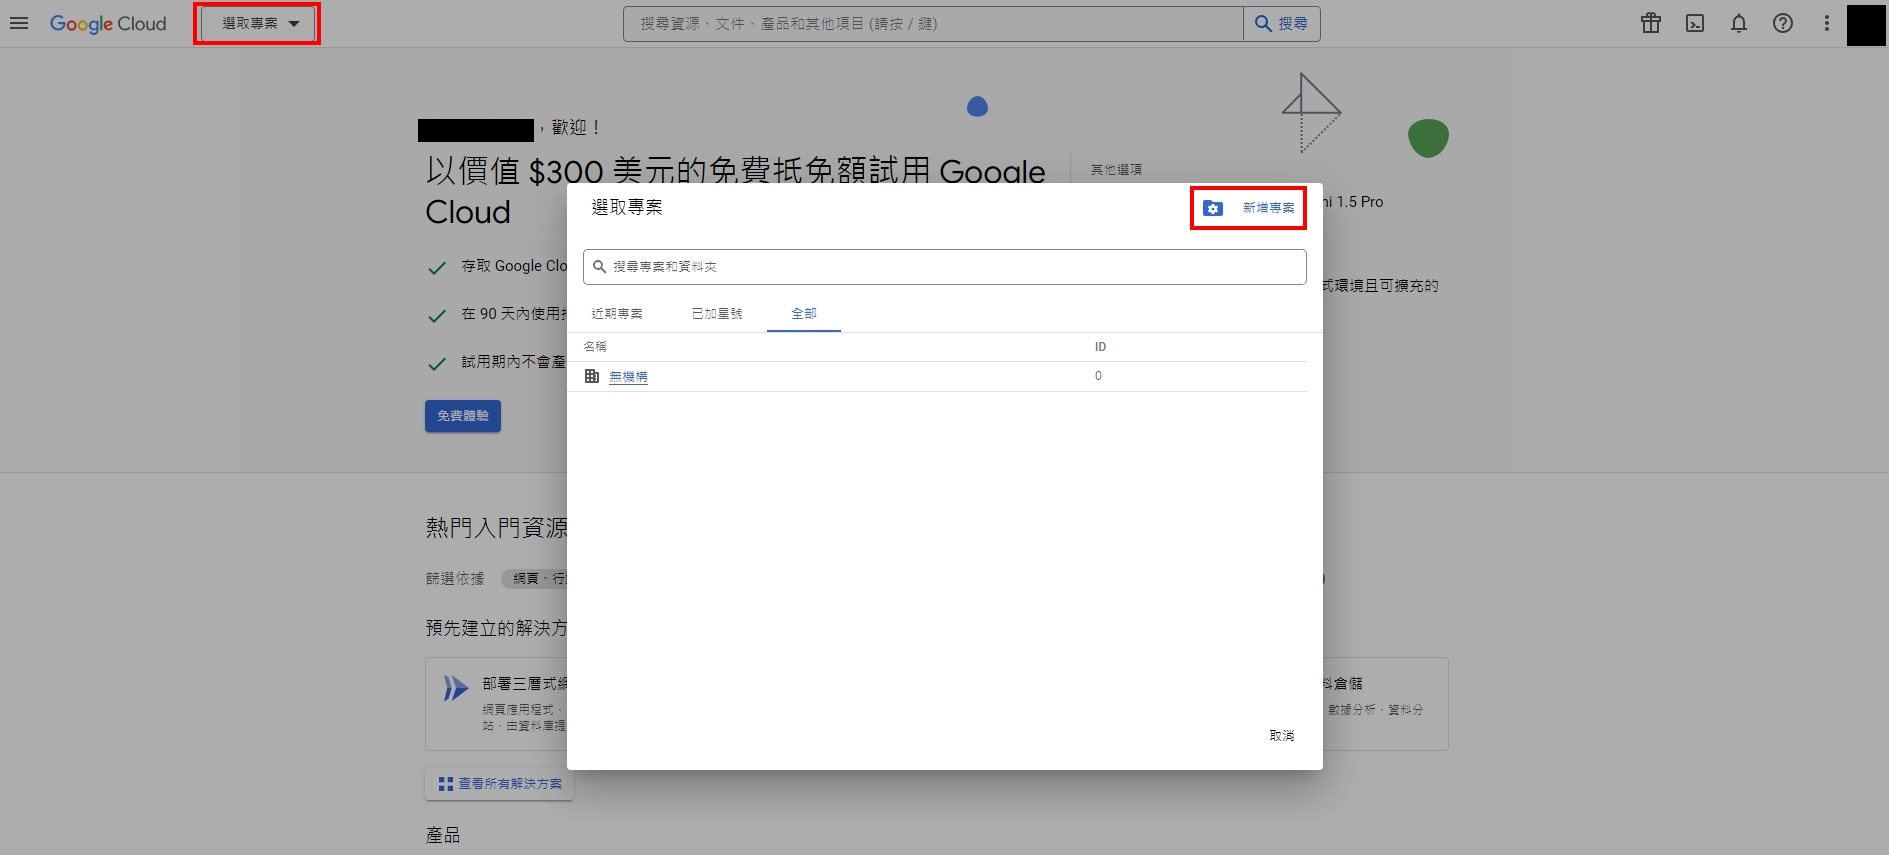
首先使用自己的Google帳號登入Google Cloud Console
點選左上角的「選取專案」,之後彈出視窗內點擊「新增專案」
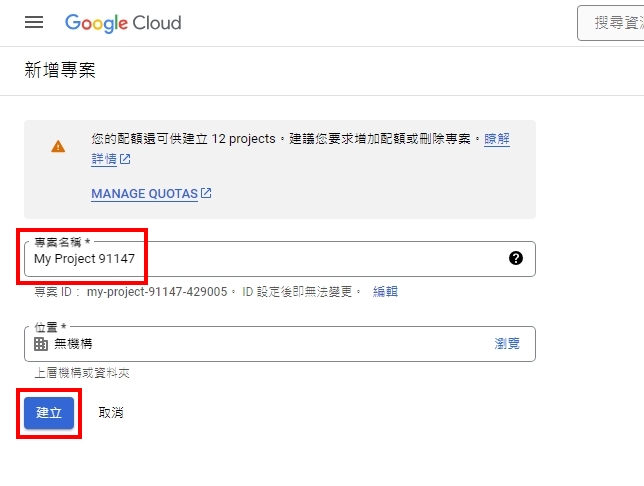
輸入專案名稱並建立後,就完成專案建立了
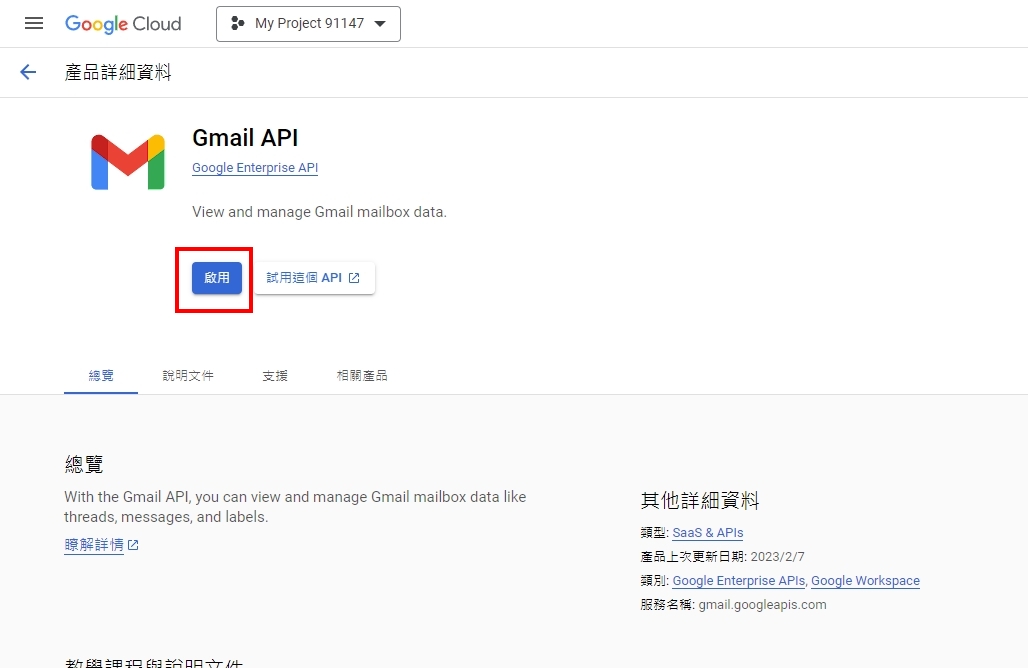
開啟Goolge Drive API
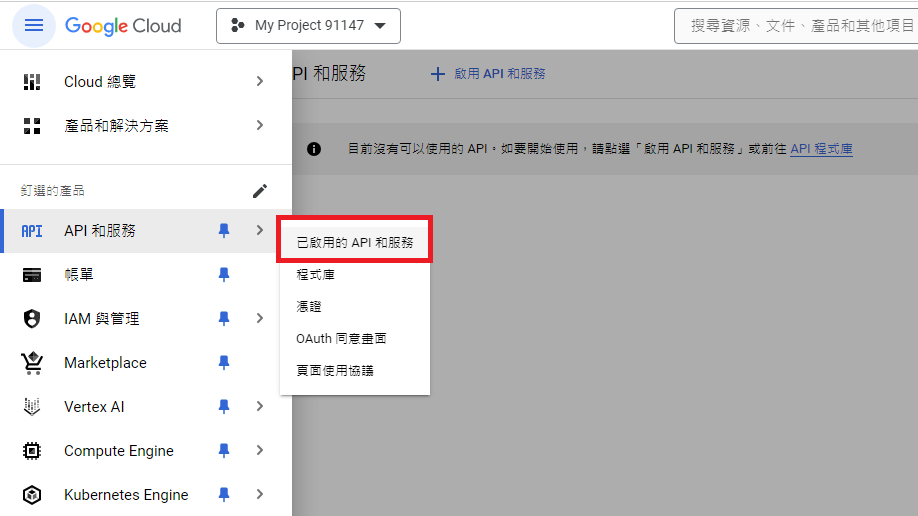
點擊左上角的選單按鈕 > API和服務 > 已啟用的API和服務
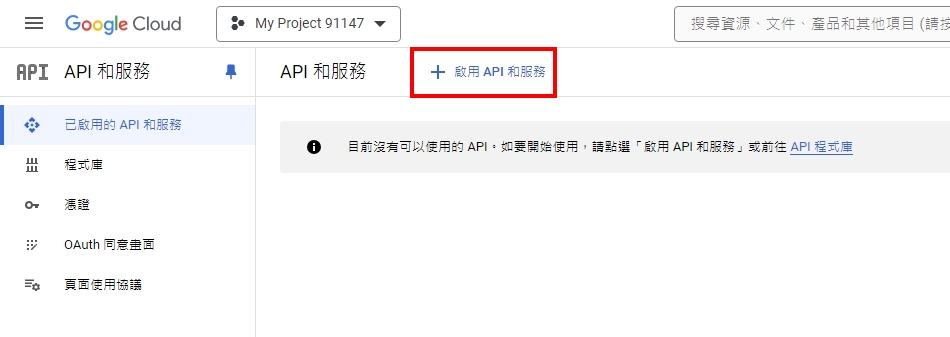
點擊「啟用API和服務」,之後在搜尋欄內輸入「google drive api」
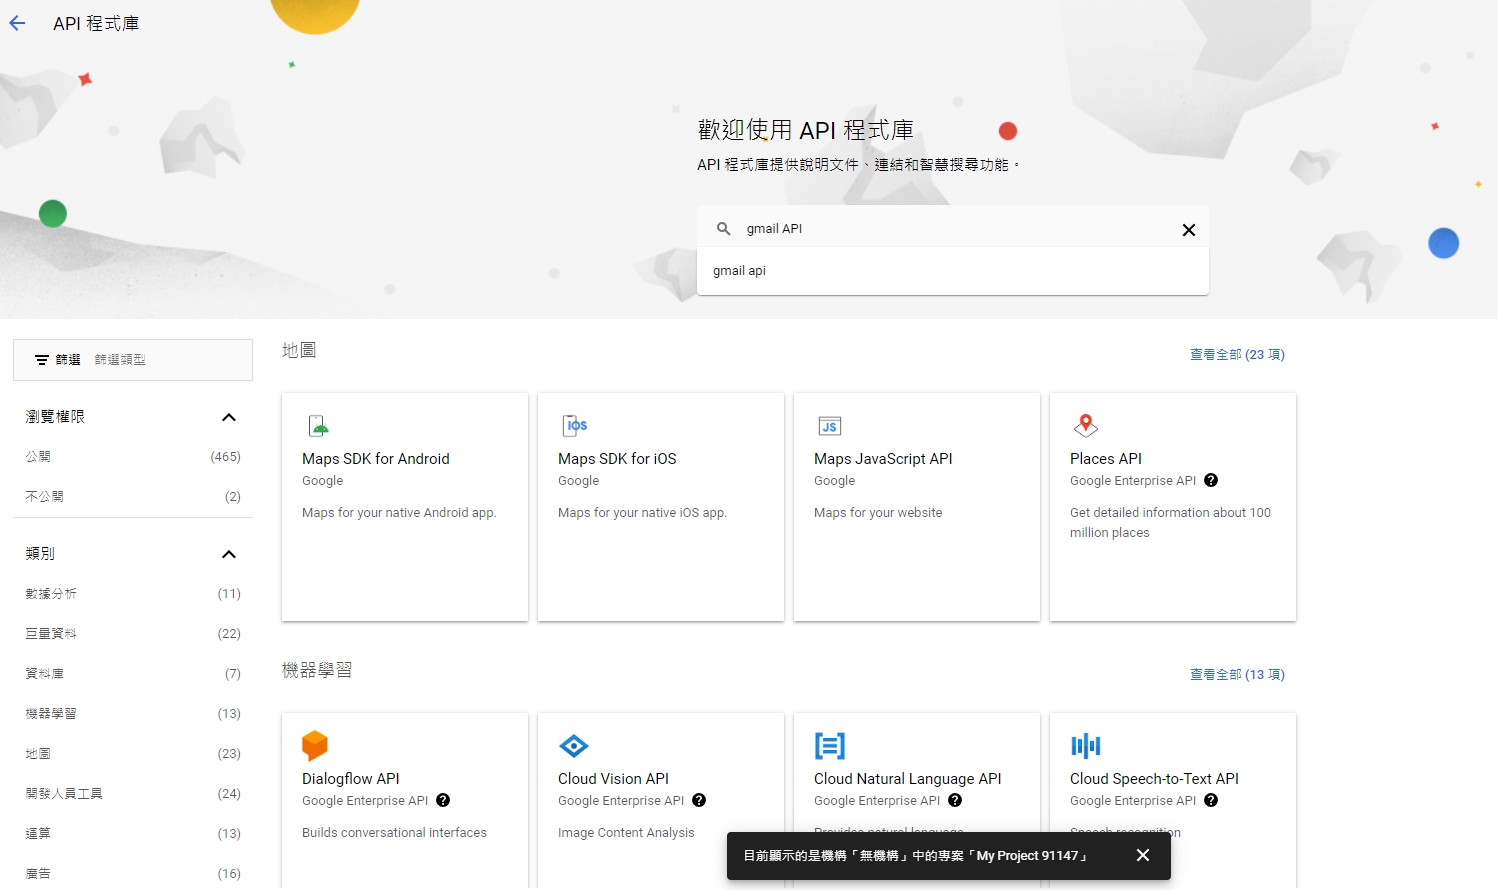
這樣就可以直接找到我們要啟用的API服務了
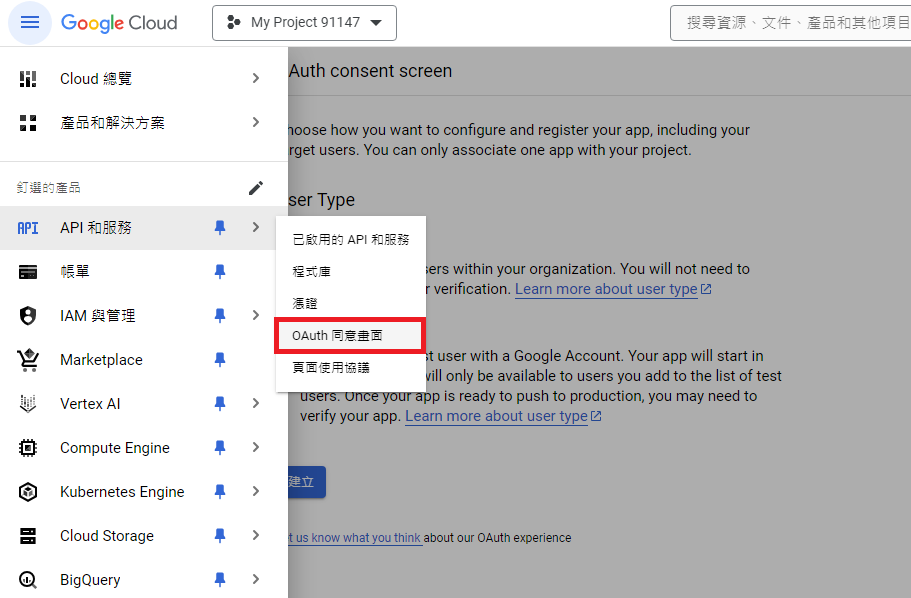
設定OAuth同意畫面
點擊左上角的選單按鈕 > API和服務 > OAuth同意畫面
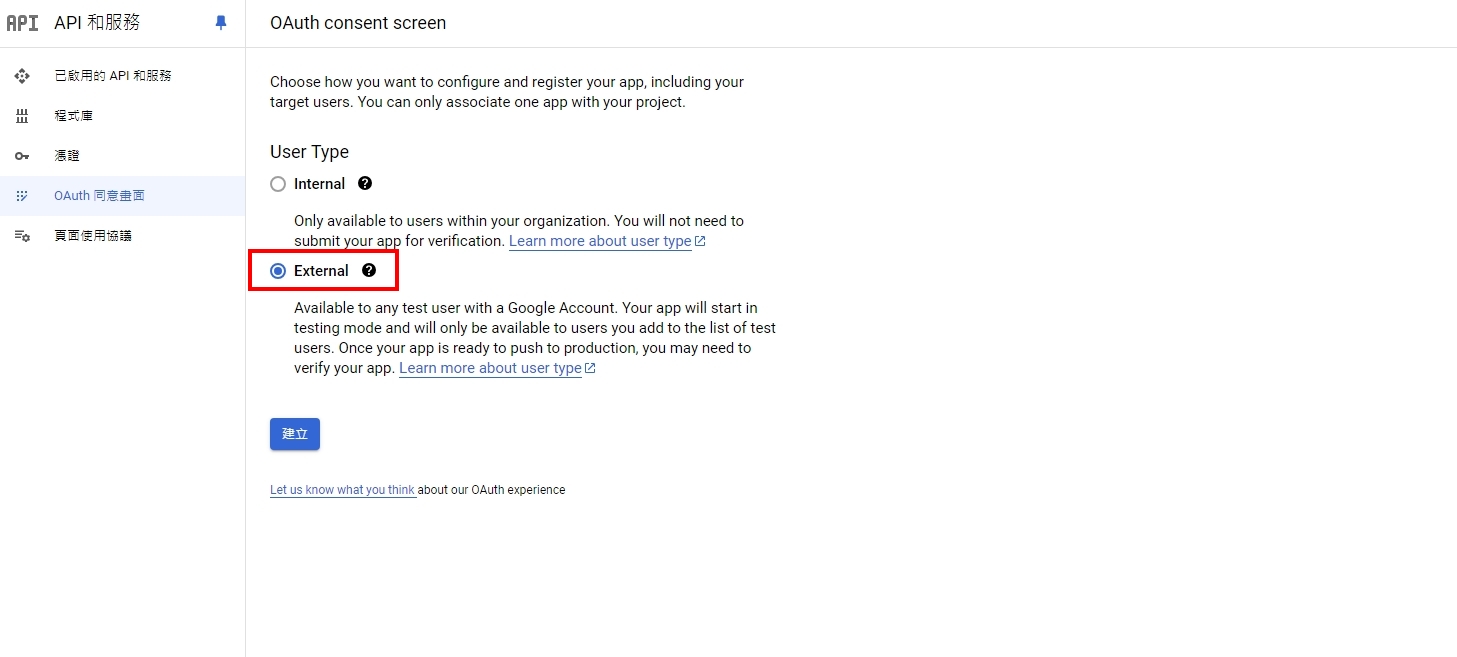
User Type 選擇 External
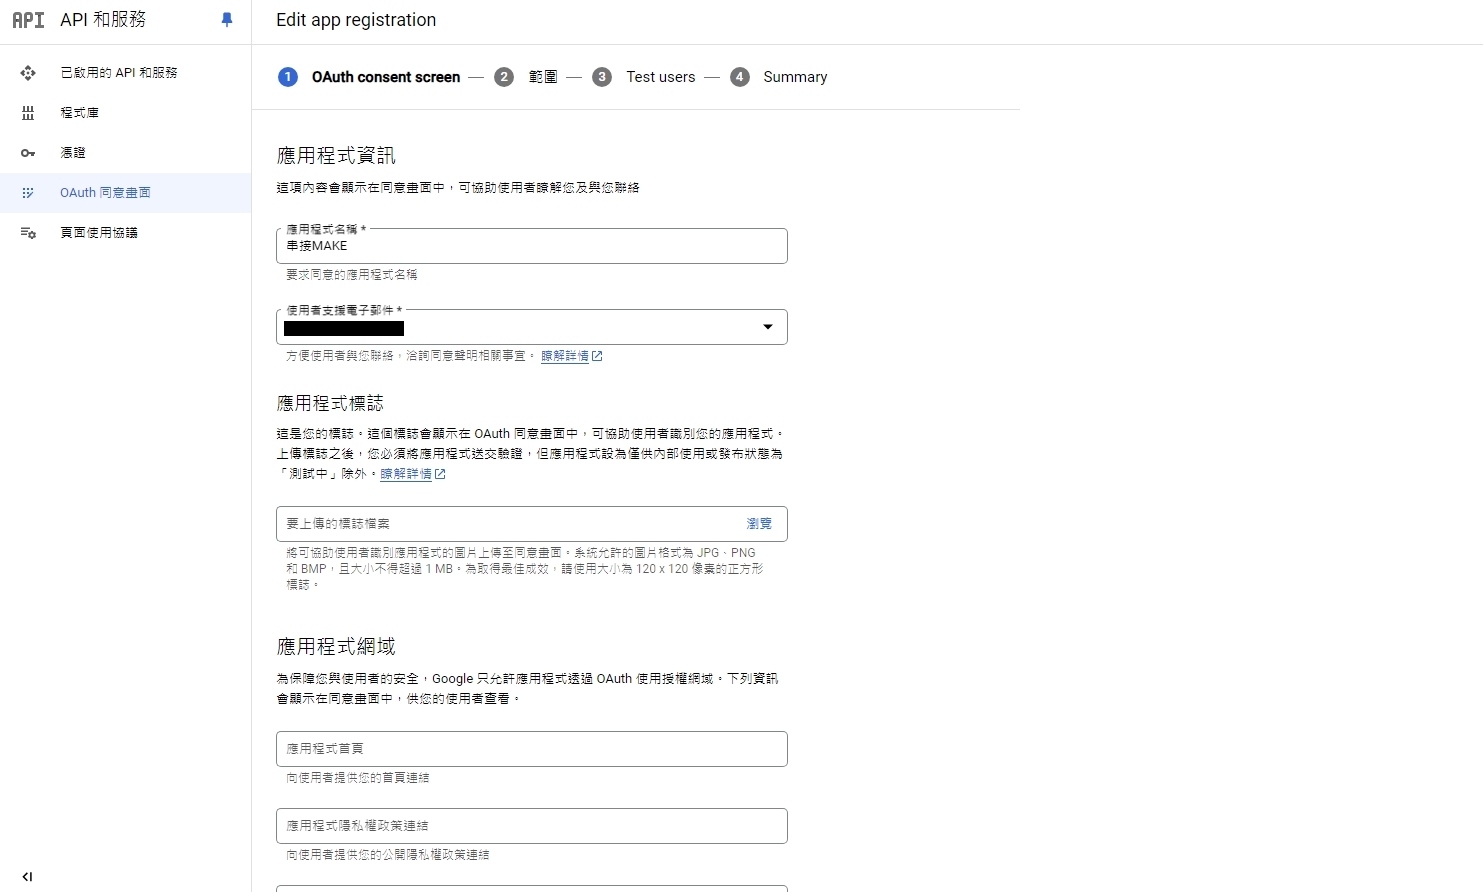
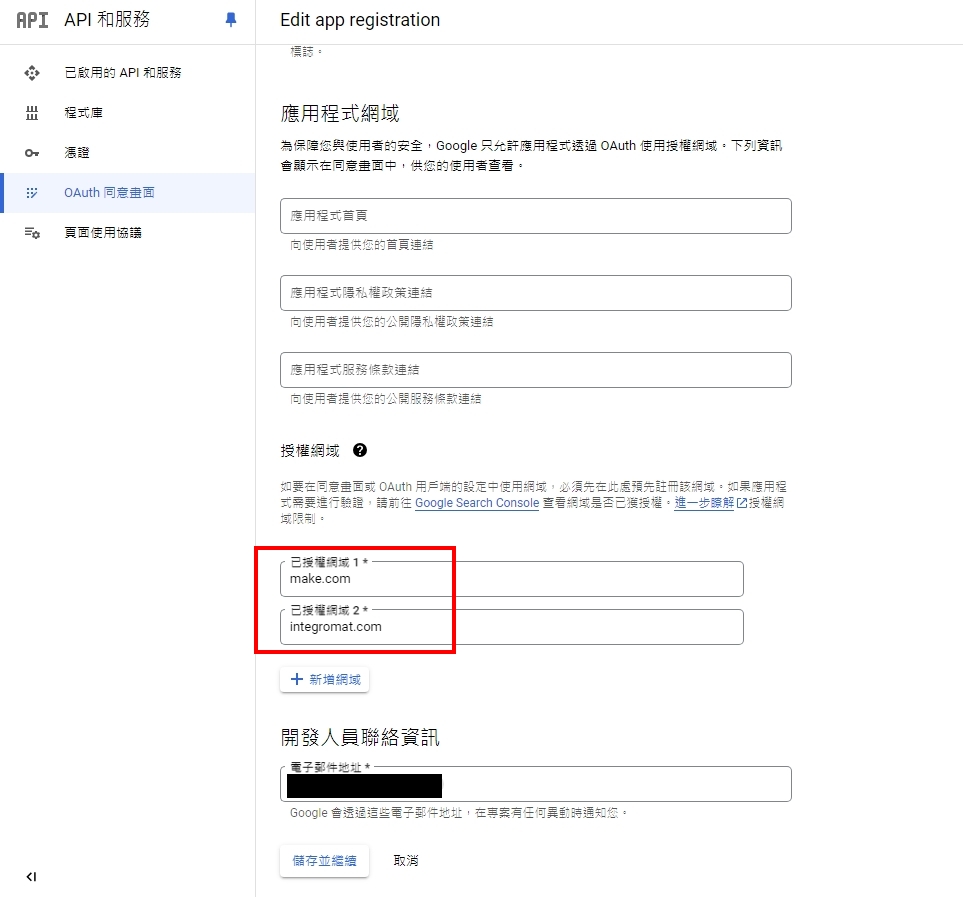
之要輸入的就是應用程式的名稱、電子郵件、授權網域
授權網域輸入
- make.com
- integromat.com
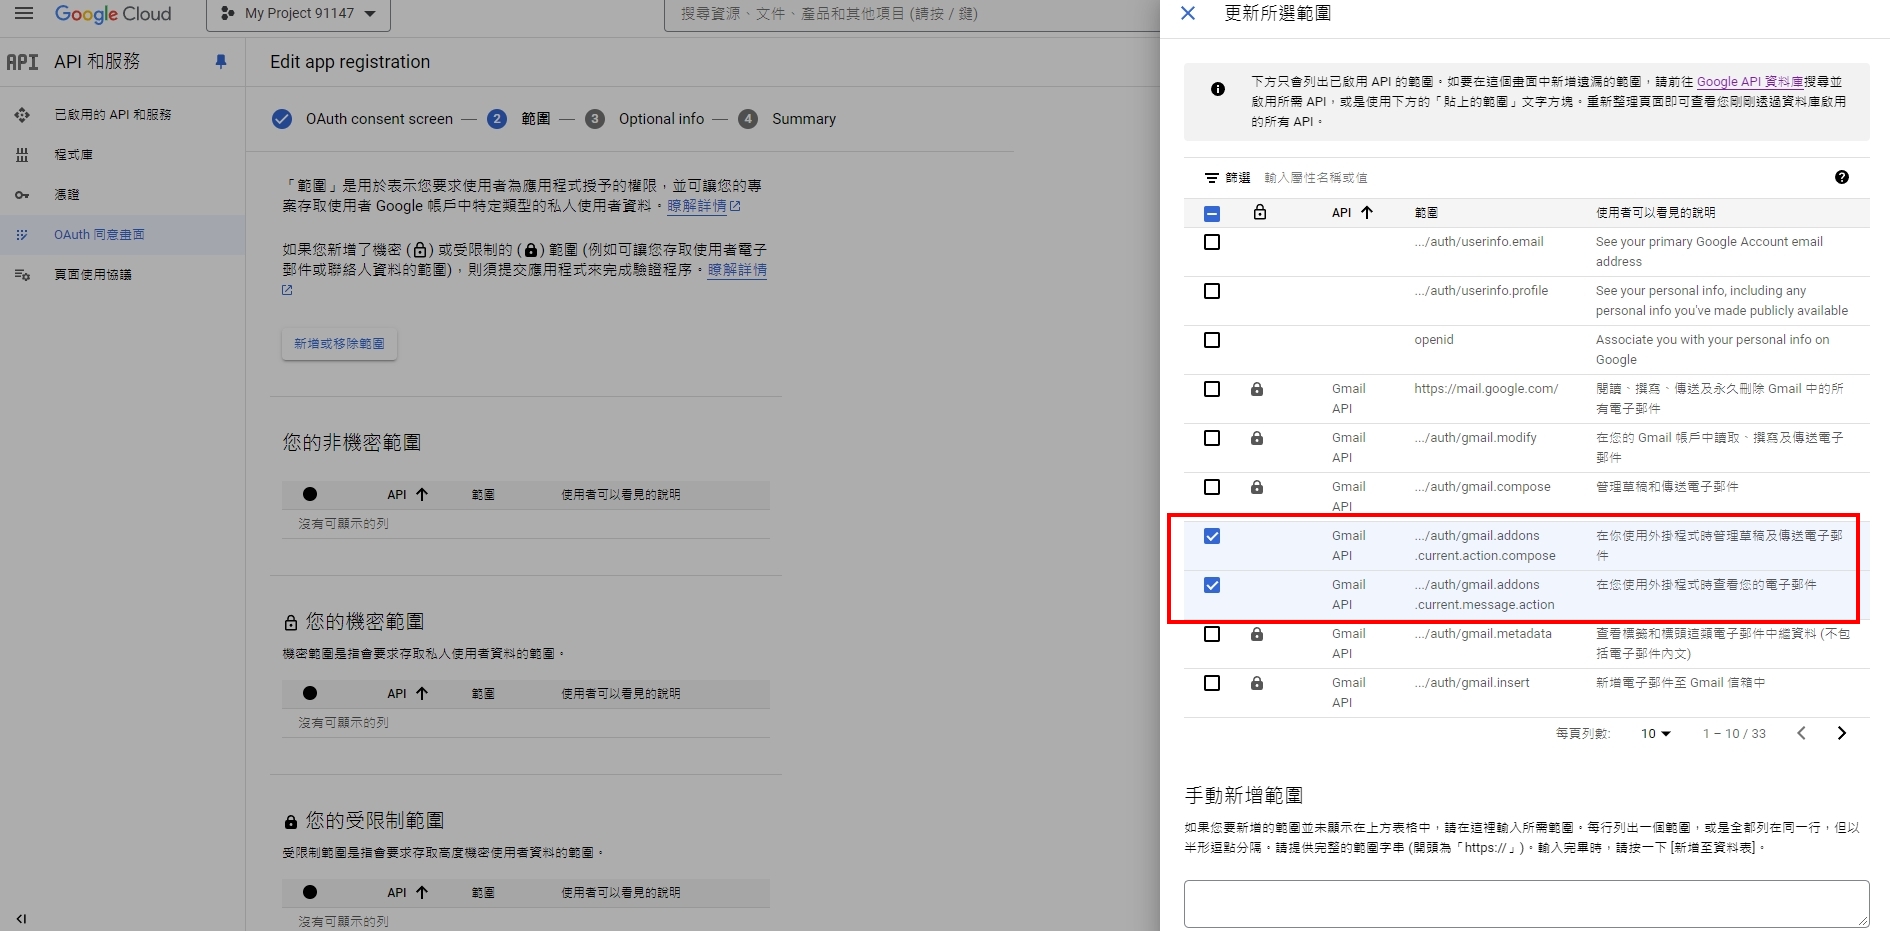
下一步選擇「範圍」
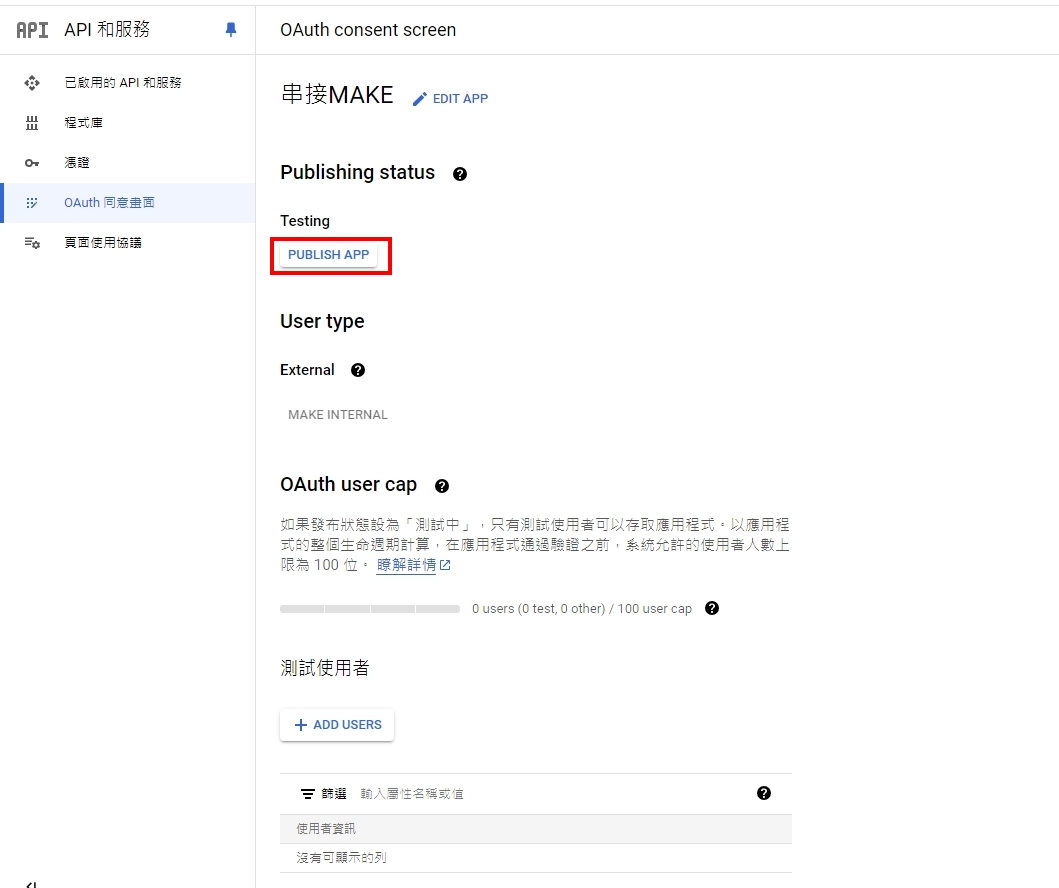
在設定完成以後,將專案發布即可
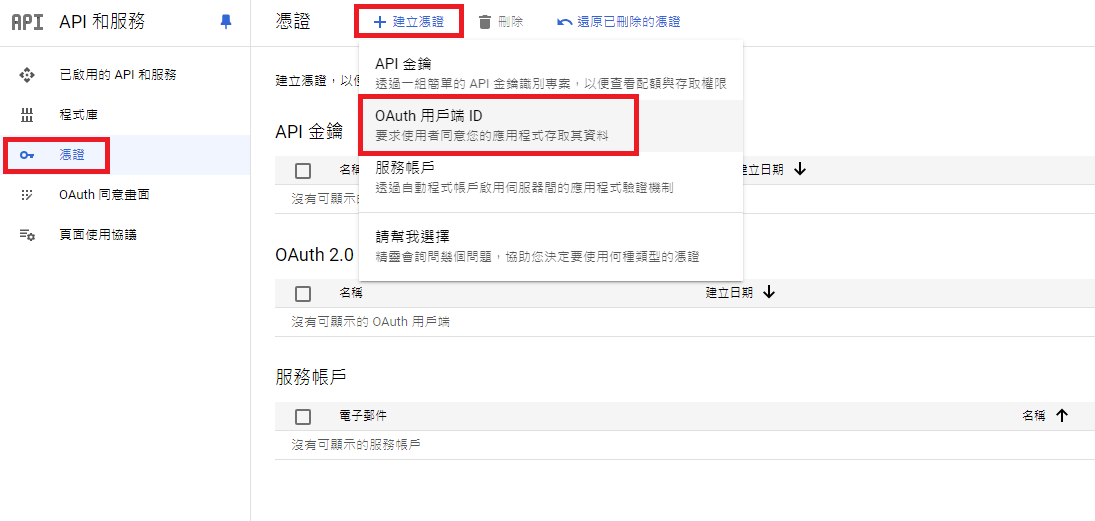
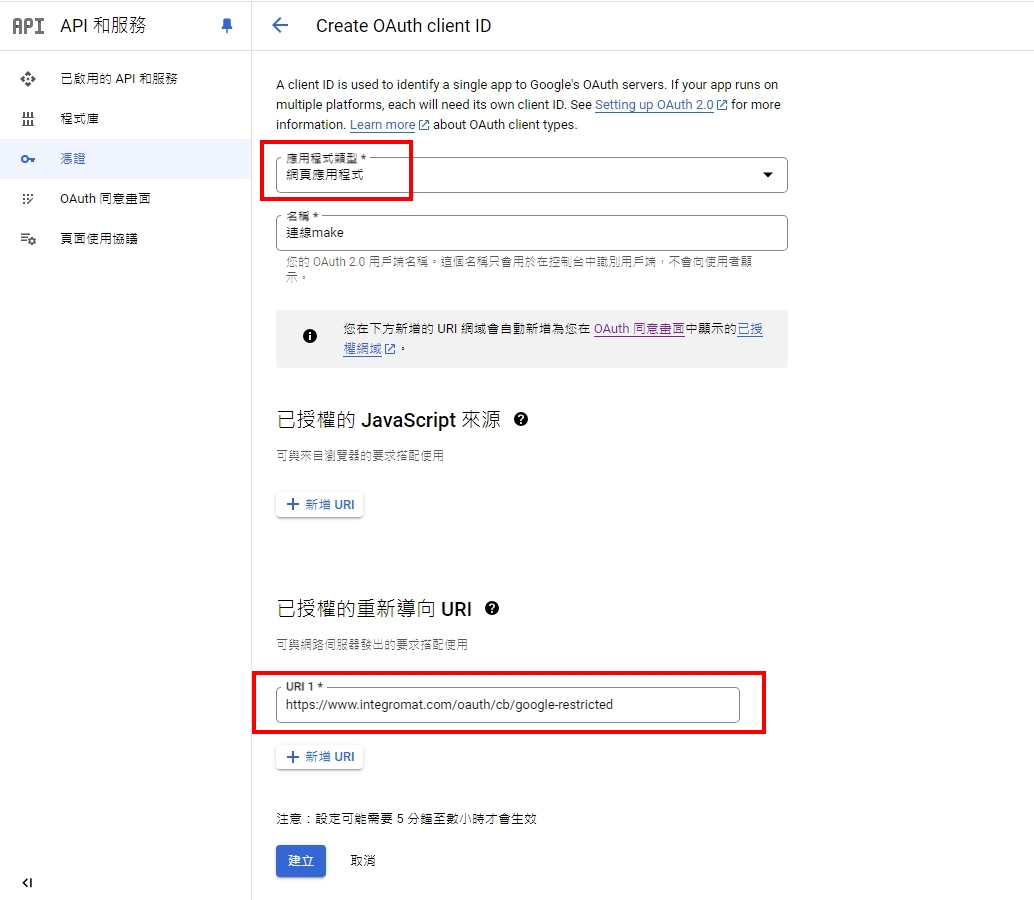
設定憑證
在左側邊欄中,按一下「憑證」
點擊上方「+ 建立憑證」 > OAuth 用戶端 ID
應用程式類型,選擇「網頁應用程式」
在「已授權的重新導向 URI」,點擊「+ 新增 URI」並輸入重定向 URI
輸入:https://www.integromat.com/oauth/cb/google-restricted
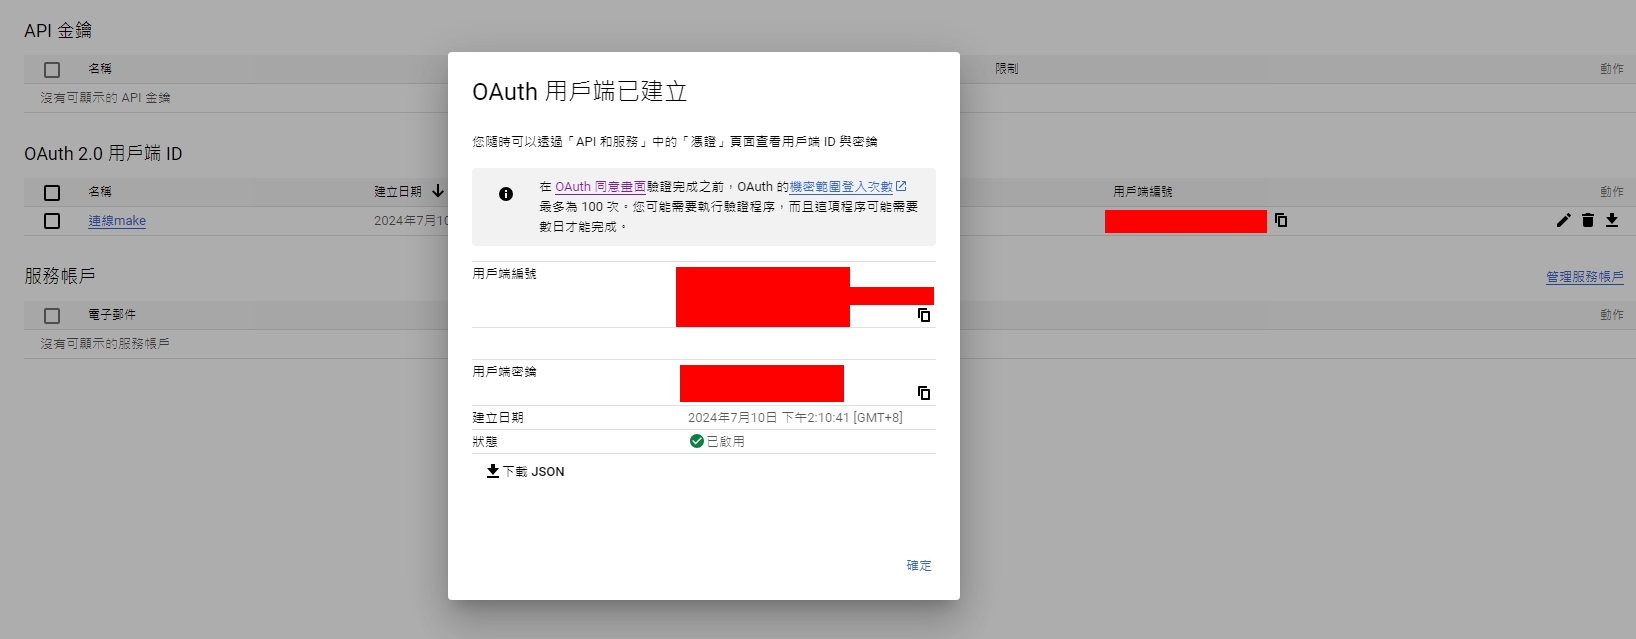
最後記下「用戶端編號」、「用戶端密鑰」
等等連線會使用到
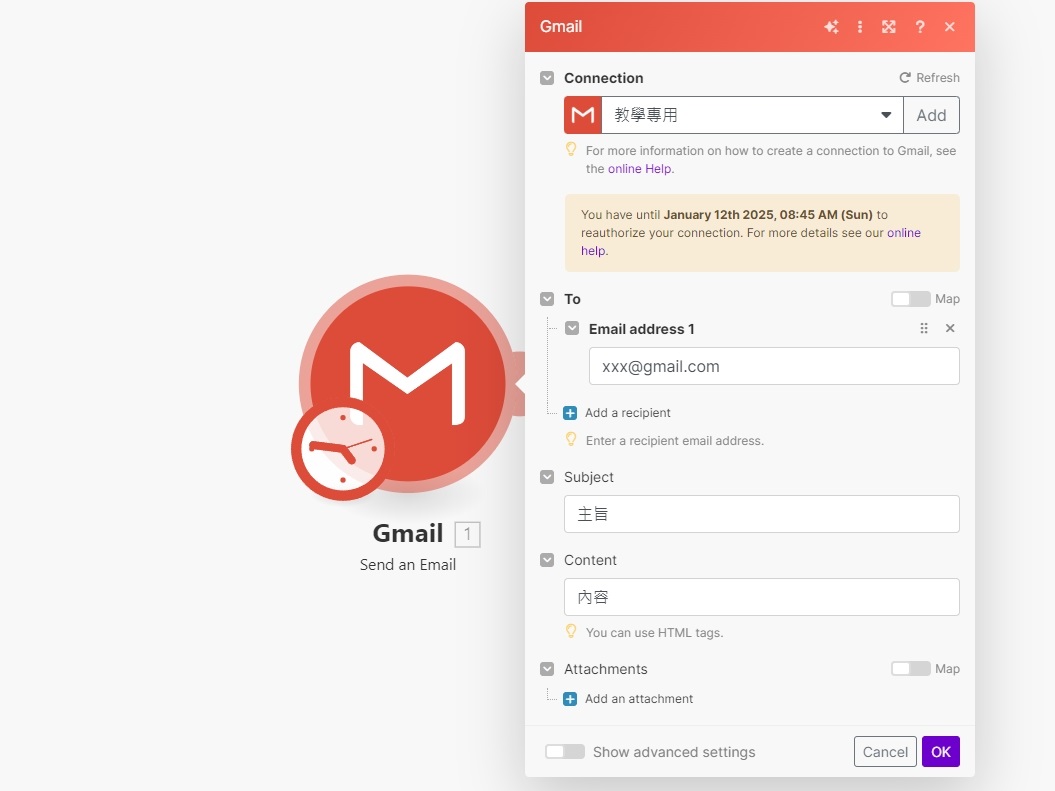
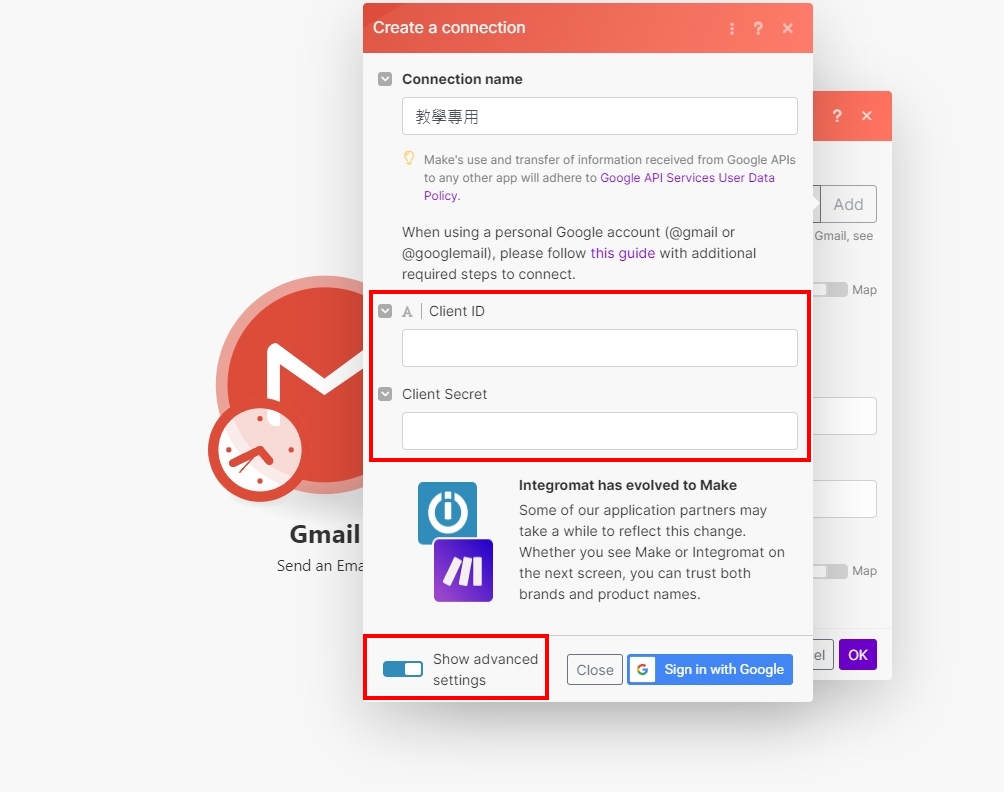
MAKE串接Gmail
在MAKE選擇Gmail的Send an Email
下方的「Show advanced settings」要點開,這樣才可以輸入剛剛建立的憑證編號與密鑰
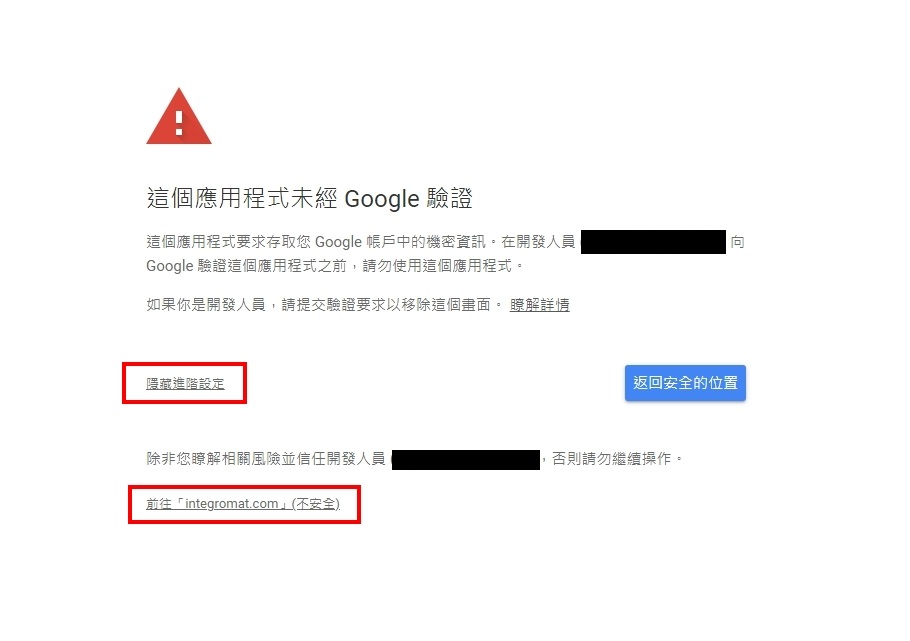
接下來選擇自己的Google帳號
會彈出說未經過Google驗證
只要點左下角的「進階」,就可以完成連結
這樣就串接完成了